Beginner Mistakes in Pyrography (And How to Avoid Them)
Learning any new skill means stumbling through a series of “oh, that’s why” moments. With pyrography, these moments often come with a little smoke and the realization that wood doesn’t forgive the way paper does. Most beginner pyrography mistakes aren’t really mistakes at all. They’re part of how you learn to work with this medium. Each misstep teaches you something essential about the relationship between heat, time, and control that no tutorial could fully explain. The burns that don’t turn out how you planned? They’re often your best teachers.
Turning Up the Heat Too High
My first pyrography disaster happened because I cranked my tool to the highest setting. It seemed logical more heat should mean better burns, right?
Wrong. High heat burns so fast you can’t control it. Your careful lines turn into harsh, overcooked marks. The wood chars instead of burning cleanly. Plus, you’ll burn through expensive tips in record time.
I learned to start around medium heat and only go higher if the wood really needs it. Every tool has its own sweet spot, and solid tip burners especially need patience and lower temperatures to perform well. If your burns look too light, try slowing down your hand movement first before reaching for that temperature dial. The wood will tell you what it needs if you give it time.
What to watch for: Burns that look angry or overly dark, tips that get sticky with residue, or lines that spread wider than you intended.
Pressing Too Hard
There’s something about holding a heated tool that makes you want to press down firmly. Maybe it feels more controlled, or maybe we’re used to pressing with regular pens and pencils.
But pyrography works differently. The heat does the work, not the pressure. When you press too hard, your lines get thick and clunky. You lose the delicate control that makes pyrography beautiful. Plus, pressing hard makes your hand tire out quickly.
I had to train myself to barely touch the wood surface. Think of it like an airplane taking off—you want that gentle, upward glide across the surface rather than pressing down into it. The heat does all the work; your job is just to guide it along.
What to watch for: Lines that are much wider than you intended, hand fatigue after short sessions, or burns that look forced rather than flowing.
Choosing the Wrong Wood
I thought any piece of wood would work for pyrography. Then I tried burning on a piece of pine with wild grain patterns and spent two frustrating hours fighting with it.
Different woods have completely different personalities. Some burn smoothly and predictably. Others have grain that sends your lines in unexpected directions, or sap that makes your tip stick and smoke excessively.
Basswood became my best friend when I was learning. It’s cheap, burns evenly, and won’t surprise you with weird behavior. Pine can work too, but avoid the resinous, sticky pieces. Save that gorgeous walnut or oak for when you’ve got some experience under your belt.
I also learned that rough wood is your enemy when you’re just starting out. I used to think I could burn on whatever wood I had lying around, bumps and all. But when your wood feels like sandpaper, your burner catches and drags instead of flowing smoothly.
Taking a few minutes to sand with fine sandpaper (220-grit works well) completely changes how your tool moves across the surface. Suddenly, your lines flow instead of stuttering along. It’s such a simple thing, but it made all the difference for me.
What to watch for: Tips that stick to the wood, excessive smoke, or burns that look patchy and uneven, no matter what you do.
Moving Too Fast (Or Too Slow)
Speed was confusing for me at first. I’d start a line moving way too fast, barely leaving a mark, then overcorrect by crawling along so slowly that I’d burn ugly halos around everything.
Moving too fast gives you light, inconsistent burns that barely show up on the wood. You think you need more heat, but really, you just need to slow down and let the heat do its work.
Moving too slow creates that ugly “glow” effect around your lines where the heat spreads beyond where you want it. Your crisp lines turn into fuzzy, overburned marks.
I learned to find that sweet spot where the wood burns cleanly without charring the edges. It’s different for every wood type and heat setting, so give yourself time to experiment.
What to watch for: Lines that are too light to see clearly, or burns with fuzzy, overheated edges around them.
Neglecting Your Tools
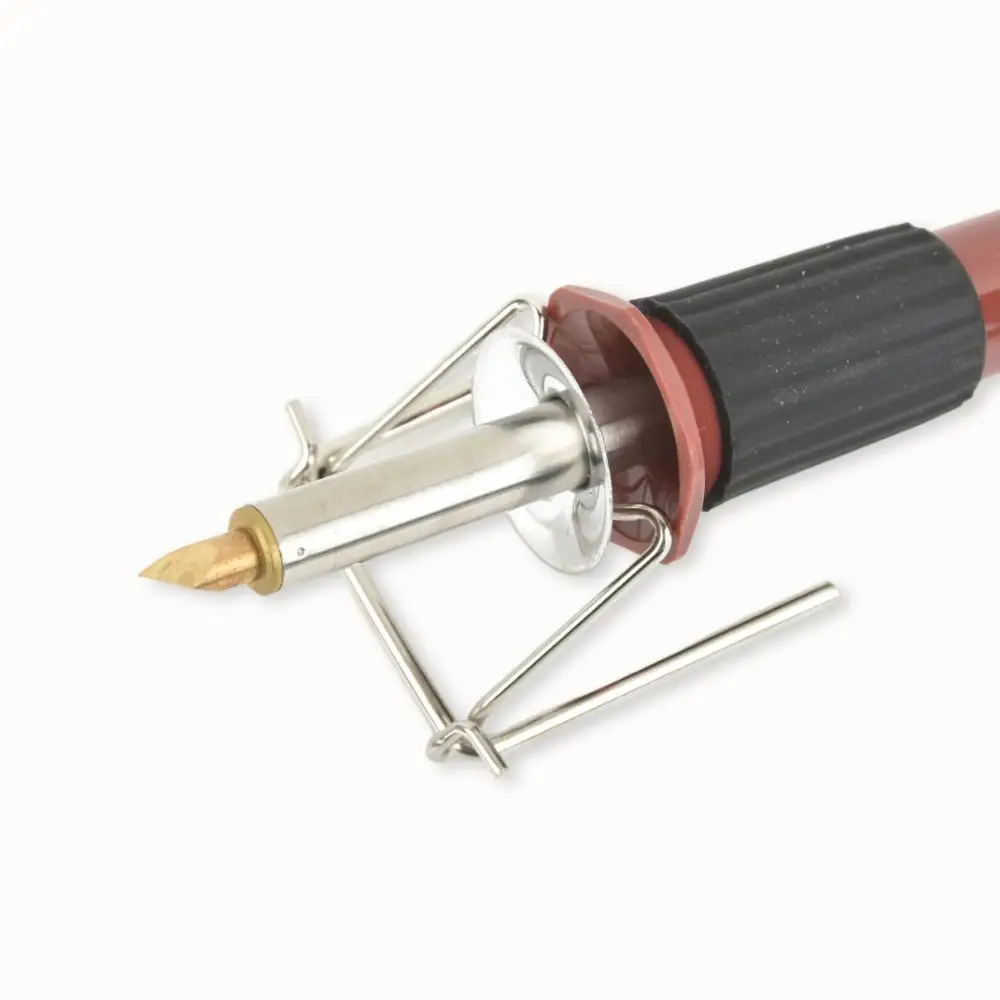
A dirty tip ruins everything. When residue builds up on your woodburning pen, it doesn’t heat evenly. Your burns become unpredictable, and you’ll blame your technique when really, you just need to clean your tool.
I used to work until my tip was completely gunked up, then wondered why my lines looked terrible. Now I clean my tip regularly with a wire brush or fine sandpaper. It takes thirty seconds and transforms how your tool performs.
Also, let your tool fully heat up before you start burning. Some tools heat up quickly, others take their time. Starting with a partially heated tip gives you weak, inconsistent burns.
What to watch for: Inconsistent line quality, tips that seem less responsive than usual, or burns that start light and gradually get darker.
Working on an Uncomfortable Surface
This one took me forever to figure out. I kept getting shaky lines and blamed my lack of skill, when really, I was just working at an awkward angle on an unstable surface.
Your hand needs support. If you’re hunched over or trying to burn on a wobbly surface, your lines will show it. I started propping up my wrist or using a turntable for larger pieces so I could rotate the wood instead of contorting my hand.
What to watch for: Hand cramping quickly, shaky lines even when you feel steady, or constantly having to reposition yourself to reach different areas.
Ignoring Ventilation and Safety
I used to work in my poorly ventilated craft room and wonder why I got headaches after every session. Turns out breathing smoke for hours isn’t great for concentration or enjoyment.
A simple fan pointing away from your workspace changes everything. You’ll be able to work longer without discomfort, and the whole experience becomes more pleasant. Plus, good airflow helps prevent that sticky residue from building up on your tips as quickly.
Some woods are smokier than others. Resinous woods like pine create more smoke, while basswood burns relatively clean. If you’re planning longer sessions, even a basic dust mask can help you work more comfortably.
Your hands and wrists need care, too. Set a timer for every 20-30 minutes and listen to it. Take breaks to stretch and rest your hands. This isn’t just about comfort. Fatigued hands make more mistakes and mistakes with hot tools can hurt.
What to watch for: Headaches during or after burning, watery eyes, tips that get sticky faster than usual, or hand cramping that gets worse as you work.
Expecting Perfect Uniformity
Here’s something that surprised me: perfect consistency looks weird in pyrography. The slight variations in line weight, the way different areas of wood grain affect the burn, the tiny imperfections that come from human hands, that’s what makes it beautiful.
I spent months trying to make every line exactly the same thickness, getting frustrated when the wood had other ideas. Then I saw work by experienced artists where the “imperfections” were intentional, and it was stunning.
The wood has its own opinions about how it wants to burn. Learning to work with those opinions instead of against them is when pyrography starts feeling less like fighting and more like dancing.
What to watch for: Frustration with natural wood grain variations, or work that looks stiff and mechanical rather than organic and alive.
Not Taking Breaks
Your hand will start cramping. Your lines will get shaky. Your patience will wear thin. This is when you need to put the tool down, not when you need to power through.
I used to think taking breaks showed a lack of dedication. It shows wisdom. Tired hands make sloppy work, and sloppy work is frustrating. Fresh hands and clear eyes always produce better results than stubborn persistence.
Set a timer if you need to. Every 20-30 minutes, put your tool in its stand and stretch your hands and neck. You’ll come back refreshed and often see your work with new clarity.
What to watch for: Lines that gradually become less controlled as you work, hand or wrist pain, or making mistakes you wouldn’t normally make.
Comparing Your Beginning to Someone Else’s Years
Social media makes every hobby look effortless. You see gorgeous pyrography pieces and assume that’s what yours should look like right away. Those photos don’t show the practice pieces, the failed attempts, or the years of learning that came before. (Or the mess just outside the frame. Let’s be real.)
Every artist you admire burned their share of wonky lines and made their share of mistakes. The only difference between them and you is time and practice. Focus on your progress instead of measuring yourself against someone else’s highlight reel.
Take pictures of your work, not to post anywhere, but to track your improvement. You’ll be surprised how much better you get, even week to week.
What to watch for: Discouragement that keeps you from practicing, or abandoning projects because they don’t match unrealistic expectations.
Why Beginner Pyrography Mistakes Are Where the Real Learning Happens
I wish someone had told me early on that the goal isn’t to avoid mistakes. The goal is to make them thoughtfully and learn from them quickly. Every wonky line, every overburned section, every moment when the wood doesn’t cooperate, these are your real teachers.
Your early pieces don’t need to be perfect. They need to be honest, practice that builds your understanding of how heat, pressure, timing, and wood work together. Be patient with yourself as you figure out how this medium wants to be used.
The most beautiful pyrography I’ve seen has character that only comes from understanding the material deeply. That understanding only comes from spending time with the tool, making mistakes, and discovering what works and what doesn’t through actual experience.
Trust that your hands are learning even when your brain feels confused. Those awkward early pieces you’re making right now? They’re doing something important. They’re teaching your hands things that no tutorial ever could. Be patient with them, and with yourself.
If you’re ready to get started, I’ve written about the basics of beginning pyrography and choosing tools that won’t work against you while you’re learning.


